

A need-to-know overview of the parts, use, and troubleshooting of pumps for hydrostatic testing
Hydrostatic test pumps help building owners, inspectors, and installers confirm that pipe networks won’t leak in the course of intended use. Proper pump operation — for revision and acceptance tests of fire sprinkler and standpipe systems, as well as pre-sale real estate plumbing inspections — means accurate results and keeping a pump in working order. In this article, we show you how to use a hydrostatic test pump or troubleshoot a pump that doesn’t work as expected.
Looking for a bit more background? For a more in-depth take on test pumps and hydrostatic testing for fire protection systems, read the following guides:
- What is Hydrostatic Testing of a Building’s Fire Protection System?
- Choosing a Hydrostatic Test Pump for Fire Sprinklers and Standpipes
- Hydrostatic Test Pump Features to Consider When Selecting a Pump
Choose the right electrical cords and check fluid levels before you use a hydrostatic test pump
The motors used in hydrostatic test pumps generally rely on one of three power sources: battery power, plug-in electric, or gas (though some smaller systems may be tested with hand or drill-operated pumps).
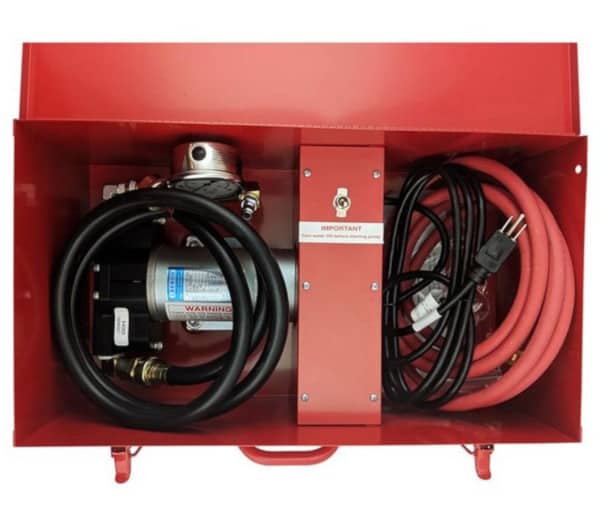
For plug-in electric and battery-powered pumps, ensure that the power source meets the electrical requirements of the motor, taking into consideration the voltage, phase, hertz, and amperage requirements specified by the manufacturer.
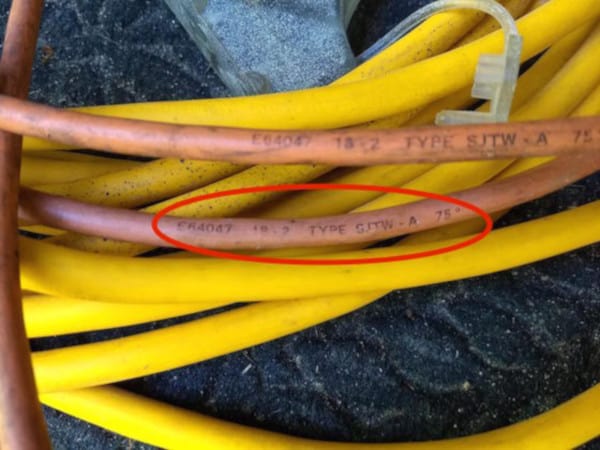
Extension cords also require careful selection: how much power they can safely deliver depends on their length and gauge. Heavy or extra-heavy-duty gauge three-wire cords — 12 gauge and 10 gauge, respectively — can usually provide the capacity needed.
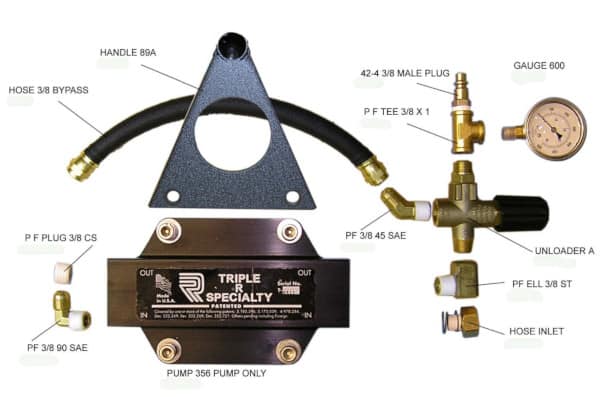
Check that the pump’s parts have enough oil and any other needed fluids, including the engine crankcase, gear reduction, gas tanks, and other pump parts when applicable. Confirm the integrity of pump hoses and fittings with a visual inspection. Following the manufacturer’s maintenance schedule, including periodic lubrication and cleaning, can spare you the trouble of having to troubleshoot a hydrostatic test pump later.
Fill the system and properly prepare parts when getting ready to use a hydrostatic test pump
First, fill the system with water and remove the air
One of the first things to consider is that the plumbing, fire sprinkler, or standpipe system needs to be completely full before you can use a hydrostatic test pump.
It doesn’t take much time for a test pump to increase the pressure in most water-filled systems — but most systems aren’t completely full. Using a hydrostatic test pump to fill piping systems isn’t the best option, as smaller pumps can’t flow enough GPM to do it quickly.
“They have air in them,” says Triple R Specialty, a Florida-based manufacturer of hydrostatic test pumps and plumbing tools. “When you start handling compressed air, it takes a lot longer to compress air than it does water.” It takes 0.9 gallons of water to replace each gallon of compressed air trapped in the system, meaning that a 2 GPM pump will need to pump an additional five minutes for every 10 gallons of air trapped in the piping.
The alternatives to filling the system are using a pressurized water source (the city water supply is most common) or a large transfer pump capable of moving large volumes of water quickly. At the same time, bleed the air from the system using valves at the high point and/or the section of the system opposite the inlet where the hydrostatic test pump is connected.
Next, connect the hoses and prime the hydrostatic test pump
Note: these instructions will vary for every pump and should be treated as best practices, not a one-size-fits-all guide. Always review your manufacturer’s manual.
Before you use a hydrostatic test pump, make sure that any strainers or washer screens for the input hose are connected to the pump’s intake fitting. Fasten the intake hose to the pump and your water source, ensuring that the line is unkinked.
Next, attach the high-pressure output hose to the pump — but don’t connect the output end of the hose to the system just yet. If your pump uses a pressurized water source, turn on the supply of water and open the outlet valve to purge air from the pump. Pumps using a non-pressurized supply should be placed at a lower elevation than the container holding the supply of water and then turned on with the priming valve open. In these cases, gravity serves as the pressure source needed to flow water into the pump.
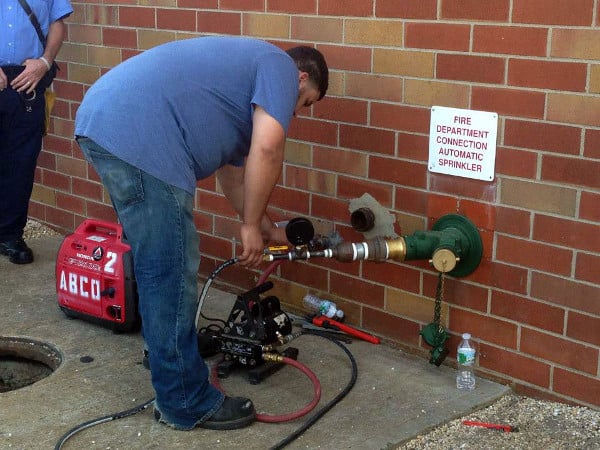
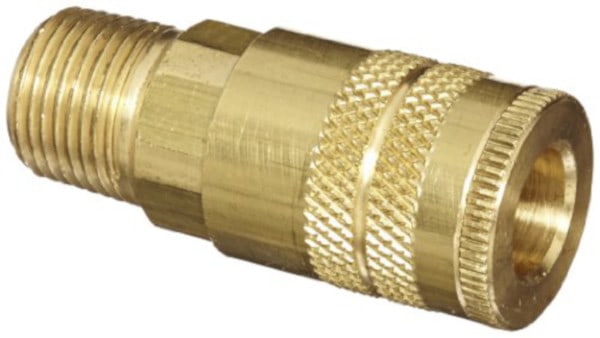
When water flows out of the high-pressure hose, close the outlet valve (and turn off the pump if it’s on). Then, connect the output hose to the system being tested. Connecting the output hose to the system inlet may require additional reducers or adapters, particularly when securing a hose to a fire department connection (FDC), as pictured below.
Conducting pressure tests with a hydrostatic test pump
Starting and running the pump
Once you’ve inspected, primed, and attached the pump — and ensured that the system undergoing testing is sufficiently filled — it’s time to start pressure testing.
With the outlet valve open, turn on the pump. Check for leaks and monitor the supply and system-side gauges to determine if the pump is pumping water into the system.
If your pump features a pressure regulator, close the outlet valve, adjust the regulator to the desired setting, and wait until the pump’s gauge reaches the desired pressure before re-opening the outlet valve. (If the supply-side pressure isn’t building up, follow the instructions below for stopping and troubleshooting your pump).
Now, it’s time to monitor your supply-side gauge. These gauges, sometimes installed between the pump and the system inlet, measure the pressure inside the fire sprinkler, standpipe, or plumbing system. Commercial fire sprinkler systems should reach a minimum pressure of 200 psi or, when the normal working pressure is above 150 psi, 50 psi higher than that pressure. A nearly identical standard applies to manual dry standpipes, semi-automatic dry standpipes, and manual wet standpipes that aren’t part of a combined sprinkler/standpipe system.
Pumps with an automatic bypass pressure regulator will recirculate water when the pump reaches the desired pressure, preventing the buildup of excess pressure in the system. BUT – and this is critical – don’t let the pump run in bypass mode for too long. While manufacturers’ recommendations vary on how long is too long, anywhere from a few minutes to an hour in bypass mode could create enough friction to damage the pump.
Stopping the pump
When the pump reaches the desired pressure, take the following steps in quick succession:
- Close the outlet valve
- Turn off the pump
- Unplug the power (when applicable)
- Disconnect the high-pressure outlet hose (select models only)
Step four applies when using a hose with quick-disconnect couplings, which feature a one-way valve designed to detach the hose from the pump while maintaining system pressure. Inspectors of fire sprinkler and standpipe systems need to verify that the system being tested remains pressurized without assistance from the pump. Disconnecting the hose provides a quick visual confirmation that it’s the pipes, and not the pump, maintaining pressure.
Troubleshooting a hydrostatic test pump
Many hydrostatic test pumps sent in for repair aren’t actually broken. Proper troubleshooting procedures can rule out common problems.
When troubleshooting a hydrostatic test pump, first follow these steps to check for clogs:
- If the pump is currently in use, turn it off and then stop the water supply and disconnect the output hose from the system.
- Place a ball valve on the discharge end of the high-pressure output hose (if included, use the pump’s built-in ball valve)
- Open the ball valve.
- Turn on the water supply and wait for the water to flow. If water isn’t flowing at the proper rate (or not at all), there’s likely an obstruction in the supply line or a clogged inlet filter. Clear the debris and test again, checking the supply-side hose, strainer, and inlet fittings.
If water successfully clears the pump, it’s time to take the next step in troubleshooting a hydrostatic test pump: confirming that the pump can create pressure.
- Repeat the steps above and turn the pump on.
- Gradually bring your ball valve to a partial but not complete close. This allows pressure to gradually build up inside the pump. Full closure of the ball valve can cause a rapid rise in pressure, damaging pump components or hoses.
If the pump successfully pressurizes, the problem is elsewhere. Any of the following may be causing low-pressure readings:
- Broken pressure gauges. Troubleshoot by swapping in a different gauge.
- A leaky, kinking, or collapsing supply hose. Try another hose.
- If the pressure remains low during testing, the culprit might be leaks in the system piping, or the system is too large for your pump.
If these steps fail, you’ll need to consult the manufacturer’s documentation or contact them directly to finish troubleshooting your hydrostatic test pump.
Replacing a faulty test pump
Now you know how to use a hydrostatic test pump and how to troubleshoot one. If your current model isn’t up to par or is beyond repair, QRFS stocks a selection of reliable, compact hydrostatic test pumps from Triple R Specialty.
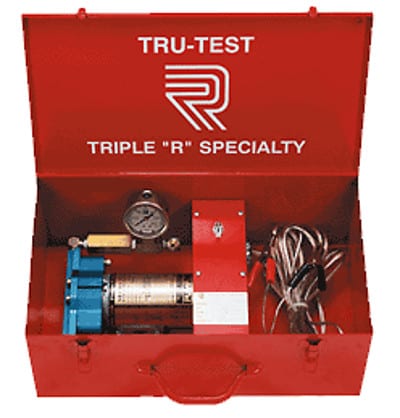
This 12-Volt Tru-Test Pump is battery-powered and surprisingly lightweight. Triple R also manufactures a 120-V AC electric model with identical volume and pressure specs.

The HT-89A hydrostatic test pump delivers larger volumes and includes a pressure regulator.
For more information on these pumps and what they’re capable of, take a look at our guide to hydrostatic test pump features, or tap into our know-how by calling +1 (888) 361-6662 or emailing support@qrfs.com.
This blog was originally posted at blog.QRFS.com. If this article helped you, check us out at Facebook.com/QuickResponseFireSupply or on Twitter @QuickResponseFS.